I recently got access to a Sitecore Search sandbox and one of the first things I tried out was to set up a Web Crawler. In this post I will outline the steps I took and provide a quick overview of the Sitecore Search service. I future post I will spend some time going into details, but if you – like me – like to get up and running without too much hassle, this is the guide for you.
Sitecore Search is a hosted search service that allow us to build personalized search experiences without coding. However, to actually utilize our search service, we need to “embed” the search experience on a frontend application (like a web site), and this will require a bit of coding.
However, in this post I will use the Sitecore Search Starter Kit to get at React web site up and running locally. The Starter Kit is an example implementation offered by Sitecore and minimize the amount of coding needed. Behind the scenes, the Starter Kit uses the Sitecore Search JS SDK. This SDK includes all the building blocks we need to build frontends for our search experience using React.
Customer Engagement Console
Before we start using the Starter Kit, we will be using the Customer Engagement Console (CEC) to set up a Web Crawler. The Customer Engagement Console is the dashboard for managing our search service.
When logging into the Customer Engagement Console we will be presented with the Site Performance dashboard:

As I am using an empty sandbox the performance screen is a bit underwhelming, but this is where we can monitor the performance of our search experiences once actual users start to use them.
In the left side of the screen, you can see the main menu. In this post I will be setting up a Web Crawler – this is done under Sources (the electrical plug icon).
A web crawler will add content items to our search service. We can browser our content under Content Collection (the database icon).
After that, we will set up two widgets (a Preview Search widget and a Search Result widget). This is done under Widgets (the puzzle piece icon).
1. Setting up the domain
However, as I will be using the Starter Kit example implementation, we need to add few settings to our domain: The domain settings are located under Administration (the gear in the bottom of the left menu).
The required settings are described in the Starter Kits README.md file. They consist of:
- Adding a
title_context_awaresuggestion option to the Suggestion Blocks. - Adding two sorting options called
featured_descandfeature_ascin Sorting Options.
This is done under configured under Administration > Domain Settings > Feature Configuration:

The details for these options are documented here and for now we will simply set them up exactly as described.
After saving our changes, we will need to publish our domain settings and we should be ready to add our Web Crawler. If you forgot to set up the changes before adding the Web Crawler the crawler will need to be rerun for the changes to take effect.
2. Setting up the Web Crawler
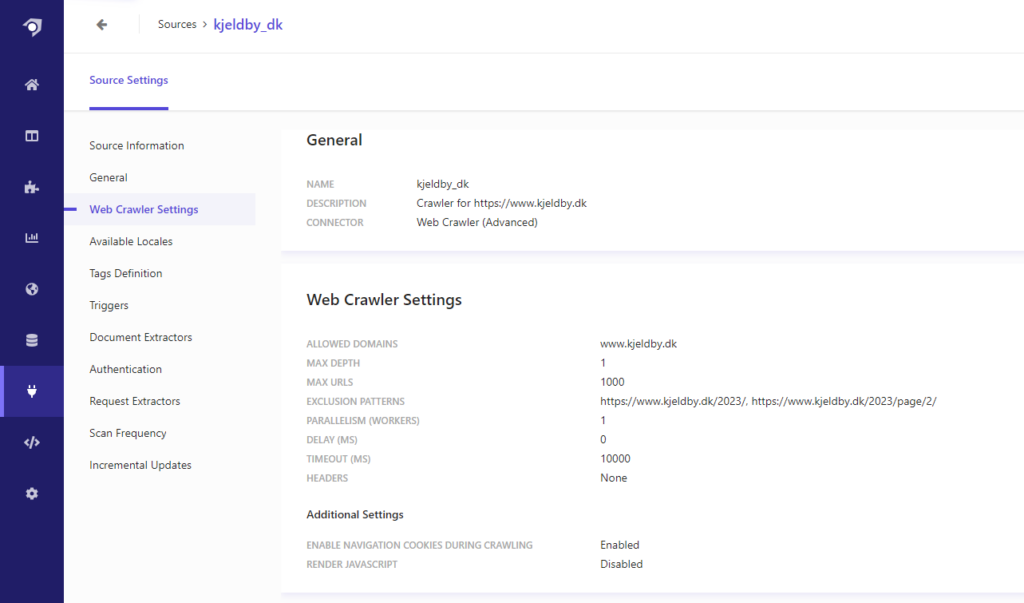
Next, we will set up the Web Crawler. This is done under Sources: In my case I have used the Web Crawler (Advanced) because it allows me to control which domains are crawled (avoiding external links) and also allow me to exclude some pages that I do not want to appear in my search results. All of this can be done under Web Crawler Settings:
We also need to configure how the crawler should extract name, description, and URL from the crawled pages. This is done using a tagger, which can be setup under Document Extractors:

As you can see, I am extracting the name, description and URL from the HTML using XPath expression (the title tag, the meta description, and the canonical link tag).
As my post usually does not contain a image I have simply “fixed” the image_url to a static value. Also, I have fixed the value of the type to post.
Finally, I have set the scan frequency to daily:

Once these settings are in place all we need to do is to save our Web Crawler and publish it – the crawler will then start to run and will hopefully add content into our search service.
Once the crawler is done, we can inspect the added content under Content Collection:
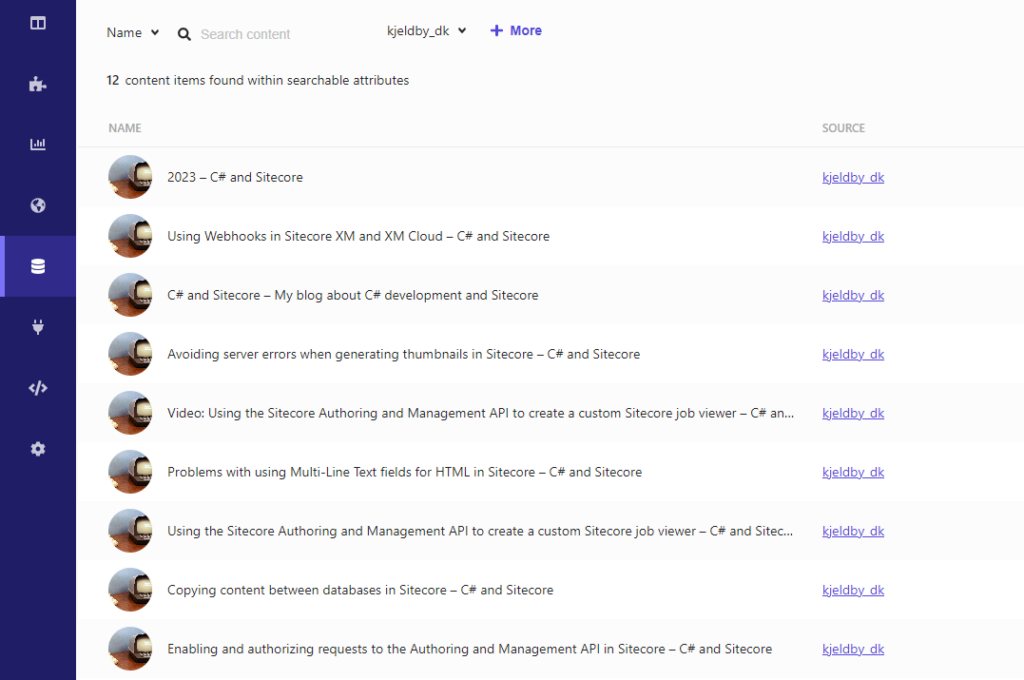
As you can see all my names are post-fixed with the name of my blog (C# and Sitecore) because I am extracting them from the title tag. We can change this in the XPath expression by using substring-before, but for now I will simply keep the names as they are.
3. Setting up the widgets
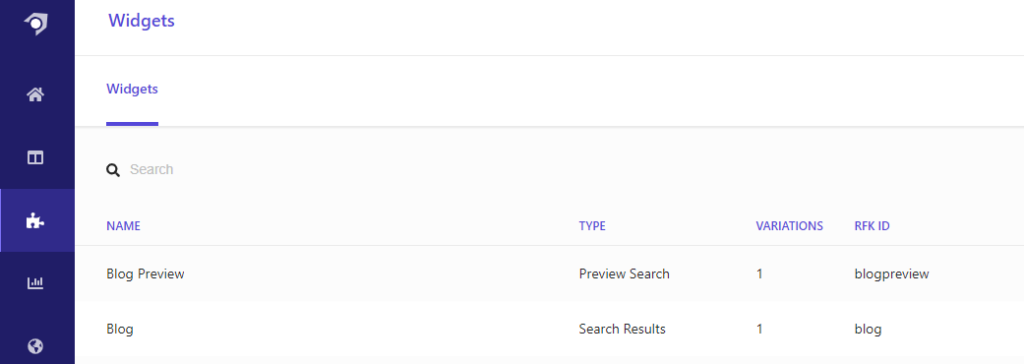
Next we need to set up two widgets – a Preview Search widget and a Search Result widget. The README.md for the Starter Kit provides RFK IDs for the widgets (rfkid_6 and rfkid_7 respectively). I honestly find the IDs a bit confusing and simply used blogpreview and blog instead.
The widgets can be set up using variations, but for now we will simply use a single variation for both.
One thing I did was to add a rule for both widgets to make sure that they blacklist (hide) content items that are not of the type post (the value that I set in my Web Crawler’s tagger):

I am a bit unsure that this is the correct approach but in later posts I will most likely add more sources (e.g., more Web Crawlers) and I want to make sure that only content from my blog Web Crawler is shown in these two widgets.
Testing the Web Crawler
With everything set up in the Customer Engagement Console it is time to set up the Starter Kit. To do this, we need to download or clone the Git repo locally, run npm install and create a .env file:
The .env file needs three settings:
VITE_SEARCH_ENV=****
VITE_SEARCH_CUSTOMER_KEY=*********-********
VITE_SEARCH_API_KEY=**-*********-*************************************
All of these values can be obtained via the Customer Engagement Console under Developer Resources (the tag icon):
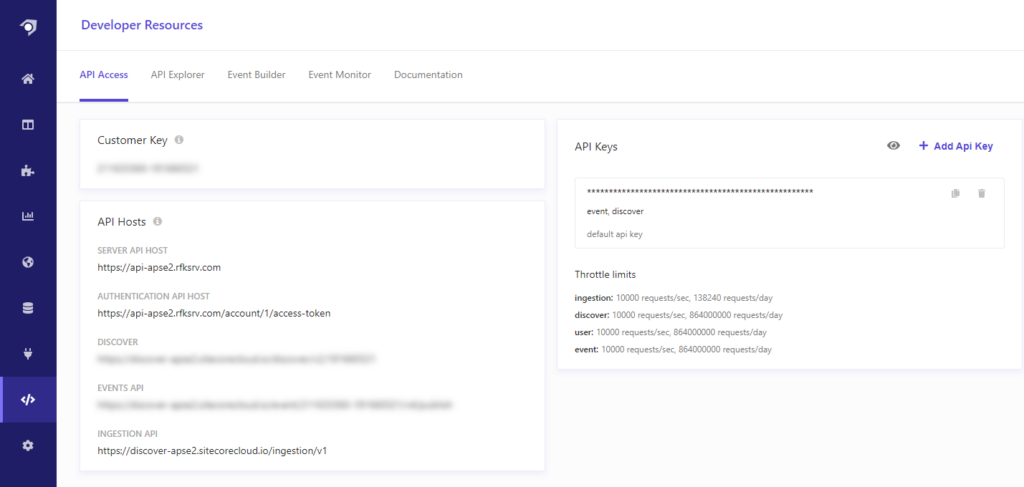
You can show the API key by clicking the eye icon in the right top part of the screen. The search environment in my case is apse2 as can be seen from the different API host URLs.
Finally, we need to go into the code and do a few changes:
In the src/App.jsx we need to comment out the SEOWidget in line 65. We will also comment out the Questions component in src/pages/Search.jsx line 32.
Also, because we did not adhere to suggested RFK IDs when setting up our widgets, we need to change the rfkId of the widget components: We will change the rfkId of the SearchResults component from rfkid_7 to blog in src/pages/Search.jsx line 33 and from rfkid_6 to blogpreview for the PreviewSearch component in src\components\HeaderInput\index.jsx:

With these changes in place, we can start our web site locally using npm run dev.
Opening the local site in a browser, we should now be able to search our content items using the search bar in the top of the web page:
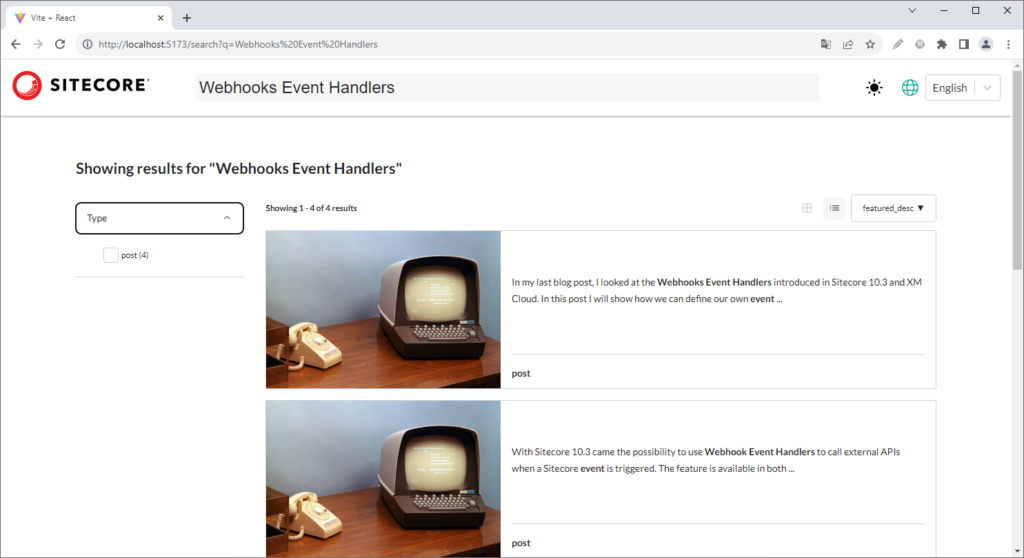
As you can see, the content type (post) is available as a facet in the left hand menu. Also our two sorting options are available in the right top dropdown. As I fixed the image, the same image is shown for each blog post in the search results.
Wrapping things up
As you can see it is easy to set up a Web Crawler and start embedding the search experience on a web site (without any prior experience it took me 1½ hour).
Of cause a lot of adjustments and styling is needed, and in my next post I will dive more into how this can be achieved. However, with these steps in place we are in a good position to explore the possibilities offered by Sitecore Search further.